Mixtable is an online spreadsheet, designed from the ground up to bulk edit and analyze Shopify data.
Got a question? We're here to help! Reach out at [email protected], and we'll get back
to you promptly.
Efficient inventory tracking and management is one of the most crucial parts of a Shopify merchant’s success. Overstocking, increased costs, delayed orders or deliveries, and dissatisfied customer can all arise from poor inventory management.
This article will show you:
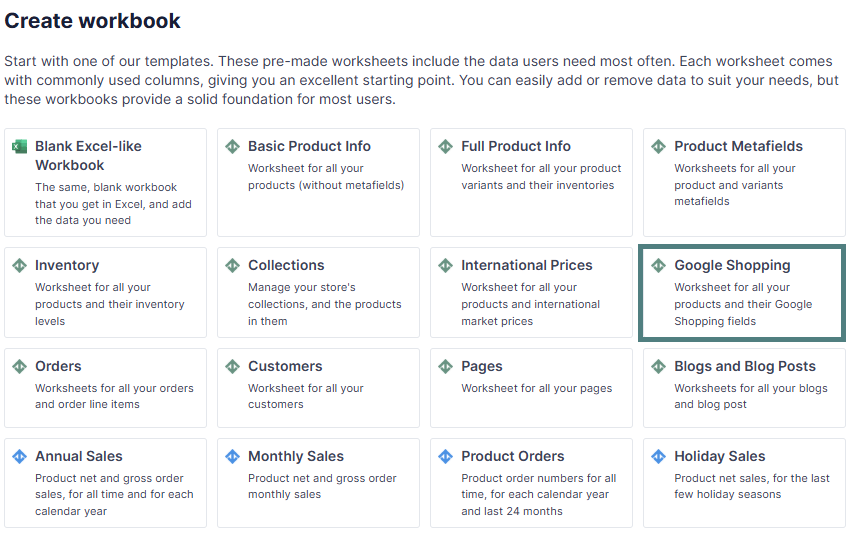
The Mixtable Spreadsheet app is an excellent tool to manage your inventory. After installing the app, you can now use the [Create a workbook] button and load the pre-built Inventory template to get started.
Inventory management is critical to the success of a Shopify e-commerce store. It’s not just about providing statistics on what you’re selling; it’s also about saving money, enabling effective cost control, and keeping your consumers happy. A Shopify store needs efficient inventory management to avoid stockouts and surplus stock, reduce the risk of overselling, increase productivity, improve customer experience, and so on.
Warehousing is frequently a variable cost, which varies depending on the amount of stuff you’re storing. Your storage costs will rise if you store too much stuff at once or if you end up with a difficult-to-sell product. You will save money if you avoid this.
Inventory management provides a clear picture of your cash flow and assets, allowing you to better understand how much to budget for stock or spend in other areas of your company.
Example: Correctly controlling your inventory can save you money on storage costs by allowing you to acquire only the amount of product you require. You’ll be able to make well-informed decisions about how to use warehouse space, whether to refill products, how to price things, and which products to discontinue stocking. As a result, you’ll be able to devote more of your budget to marketing and customer acquisition.
Inventory tracking issues can cause Shopify stores to buy too much stock (causing cash flow problems) or sell more things than they can provide. Both of these issues are detrimental to a company’s reputation and bottom line.
An inventory management system will assist you in tracking and forecasting sales, allowing you to predict how much inventory you’ll need at various times throughout the year. From there, it’s much easier to see how your inventory varies over time and how product demand shifts from season to season.
You can avoid the backlash from unfulfilled promises by accurately managing SKUs through inventory management and publishing the status of your items on your distribution channel.
Whether you’re a new Shopify store owner or launching your second store on this platform, always remember the following Shopify inventory management best practices.
Segmenting products into groups will help you determine which ones need to be ordered regularly and how quickly they’re being depleted. This allows you to concentrate on profitable items.
Consider splitting your inventory into several groups based on profitability and turnover in order to improve it. Begin with these three:
Keep track of all your products’ inventory quantities as quickly as possible. The key to moving things swiftly and efficiently is having access to the most up-to-date and accurate inventory data. You’ll need to keep track of things like barcodes, SKUs, and vendors.
Real-time inventory tracking makes it simple to conduct regular inventory audits. Many people audit their inventory once a year, while others may check their products monthly or weekly. In any event, conduct audits to guarantee that financial records and stock quantity are accurate. This will help you keep track of your inventory flow, profit, and loss and ensure that your inventory runs smoothly.
Keeping track of your inventory in a secure cloud-based system allows you to combine it with other elements of your organization and access it at any time. Such a system should also provide you with real-time, continuous stock-level updates to swiftly generate accurate reports and statistics.
Your past sales data is a gold mine of information about your company. Pay attention to what it says and adjust your forecasts accordingly. The better you get at forecasting, the less time, money, and stock you’ll squander.
Now that we know the importance of tracking and managing your inventory in Shopify let’s see how we can do it seamlessly in a spreadsheet format.
Tracking inventory is done extremely easily via a spreadsheet interface. Here you can:
Note: Before we show how to track Shopify inventory with a Mixtable spreadsheet, it’s important to explain how Shopify stores inventory. In Shopify, inventory quantities are related to variants, not products. This is always the case, even if you haven’t added any variants to a product as Shopify always auto-creates a variant for every product in its own database. This inventory-variant relationship is important to understand as we set up inventory tracking/updates in Mixtable via the Shopify inventory API.
Here are the steps to get your inventory into your Mixtable worksheet.
Note: You can choose between setting inventory manually or via formulas (see below). However, it is important to keep in mind that you can only modify information on your available inventory.
Once you’ve loaded your existing inventory at each location in your spreadsheet, managing that inventory is as easy as 1-2-3.
When using Mixtable to track and manage your Shopify store inventory, you can also use Excel formulas as long as it makes sense for your business.
Example: If you have inventory at three locations and you supply two of them from one main location you can use an Excel formula to automatically recalculate the stock you currently have at the main location.

The Mixtable worksheet will also reflect any inventory changes made in your Shopify store. If you have your workbook open when the change comes in from Shopify the updated cell will be highlighted for a few seconds in light green.
Using Mixtable, you can efficiently manage your inventory across multiple locations in Shopify, making bulk inventory updates a seamless process. In this guide, we’ll walk you through the steps to update Shopify inventory in bulk across multiple locations, ensuring that your inventory management is both effective and time-saving.
Follow these steps to map your current inventory locations to columns in Mixtable. This will show any existing available inventory at these locations and allow you to modify the inventory.
Once you have columns mapped for each location where you would like to set inventory, find the cell that shows the inventory of a particular variant at a particular location. All you need to do is change the value of the cell and click the Sync worksheet changes to Shopify button. Mixtable will now set the available inventory for that variant at the given location to the value you’ve input into the cell.
To modify the values of many cells in bulk or to change the inventory of one or more variants at one or more locations, you can use all the spreadsheet tools that Mixtable provides. You can manually change each cell, you can copy and paste, click and drag, or use the Bulk edit numbers feature.
Manually changing individual cells - when using Mixtable, you can manually modify cells one by one when you need to make small changes to a single cell. \
Use the Bulk Number Editor - use this tool when you want to make the same change to multiple cells simultaneously. The Bulk Number Editor allows you, for example, to double the values in a column, or to decrease them by a certain percentage.\
Copy & Paste - when you need to change your inventory to the same value at more than one location, you can use the copy and paste option. \
Click & Drag - in some cases you might need to have the same amount of inventory for each product variant you have. In this case you can simply use the click and drag feature to update all of your variants at once.
In addition to directly setting your Shopify product inventory to a specific value, Mixtable allows you to adjust the inventory quantity up or down. Inventory adjustments are useful to ensure that a given product doesn’t end up with an incorrect inventory value when multiple users/apps modify it. For example, if an order is placed at the same time that Mixtable is setting the inventory to some specific value, you may end up with more or less inventory recorded in Shopify than you do in reality.
To set up a column to adjust the inventory at a location follow these steps. This applies both for products and variants, and so works from a worksheets mapped to products and from worksheets mapped to variants.

Now, to adjust the inventory for a product, find the corresponding cell and enter the desired adjustment as a number.
Once you’ve done entering the inventory adjustments for all your products, click on Sync worksheet changes to Shopify and Mixtable will adjust the inventory for you. Once the inventory for a particular product/variant has been successfully adjusted, the cell into which you entered the adjustment will be cleared.

The Mixtable spreadsheet interface is a great tool to quickly enable inventory tracking for multiple Shopify products at once and to enable tracking across multiple locations. There are two ways to accomplish this.
Note: Inventory in Shopify is stored against variants, not against the parent products. So for all the steps above you need to be working in a Products (with variants) worksheet where each row represents a variant in Shopify. Keep in mind that by default, Shopify always creates a variant for a product.
If inventory tracking is not currently enabled for one or more of your products, the simplest way to enable this tracking is to set an inventory value for a particular variant at a particular location. When you initiate the sync from Mixtable to Shopify, if inventory tracking is not enabled for the given variant at the given location, Mixtable will automatically turn inventory tracking on and after that is done it will set the inventory level to the value you’ve given us.
The second way to enable inventory tracking to be done by Shopify is to set the inventory management field to have a value of “shopify” for a given variant. If inventory management is set to “shopify”, that instructs Shopify to track inventory for that variant. If the inventory management value is not set to “shopify”, then Shopify will not track inventory for the given variant.
If you already track Shopify inventory in a Mixtable spreadsheet and you have inventory updates in a CSV, you can import that CSV into your worksheet, update only the inventory columns you select, and then sync the updates back to Shopify.
Here is the quick flow:
For the full walkthrough, see Import CSV to update or add Shopify store data
When the import is done, click Sync worksheet changes to Shopify whenever you are ready to apply those inventory updates to Shopify
You're ready!
Mixtable is an online spreadsheet designed to sync data with Shopify. It looks, feels, and behaves like Excel (including formulas), but runs in your browser. With Mixtable you can:
Best of all, you can sync changes back to Shopify with a single click. Find out more about the Mixtable suite of products here.