Export Shopify Pages
Export Shopify Pages
To export Shopify pages and/or blog posts, you need an app like Mixtable Spreadsheet Editor (Shopify does not provide this functionality).
Mixtable is a powerful spreadsheet tool that makes managing your Shopify store easier. One of its many features is exporting Shopify Pages to Excel or CSV files. This guide will walk you through the steps to set up Mixtable and use it to export your Shopify Pages.
Shopify Pages in a Spreadsheet
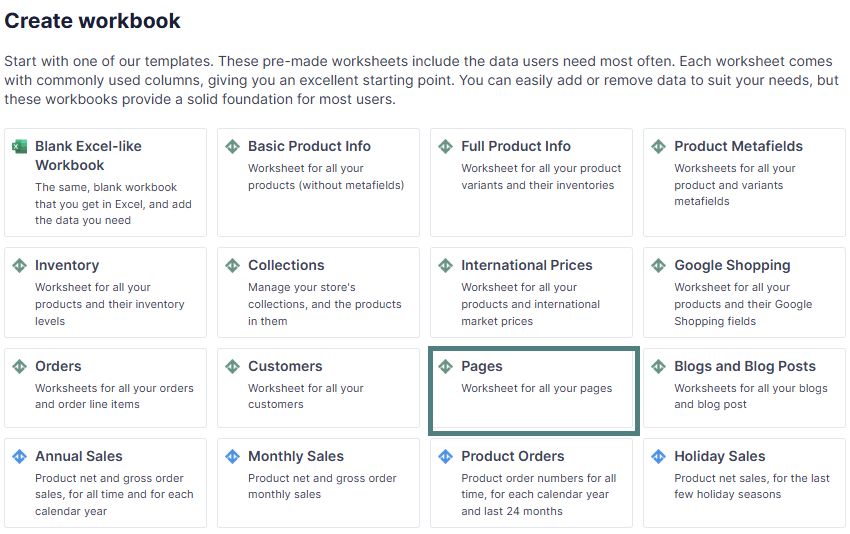
Step 1: Create a spreadsheet with Shopify Pages
After installing the Mixtable Spreadsheet Editor, open the app and choose Pages from the Create Spreadsheet section. This will create a spreadsheet that syncs Pages’ data with your Shopify store.
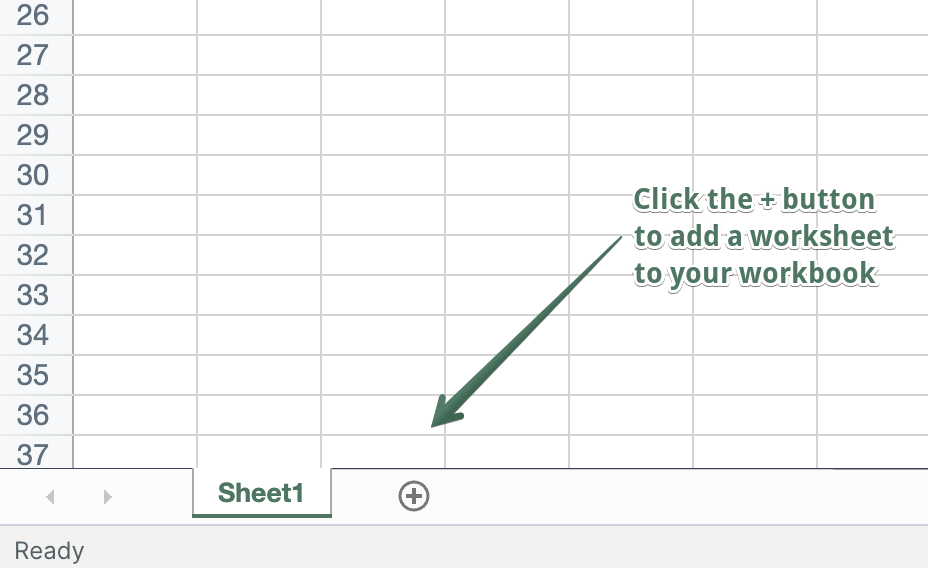
Step 2: Add Shopify Pages to an existing worksheet
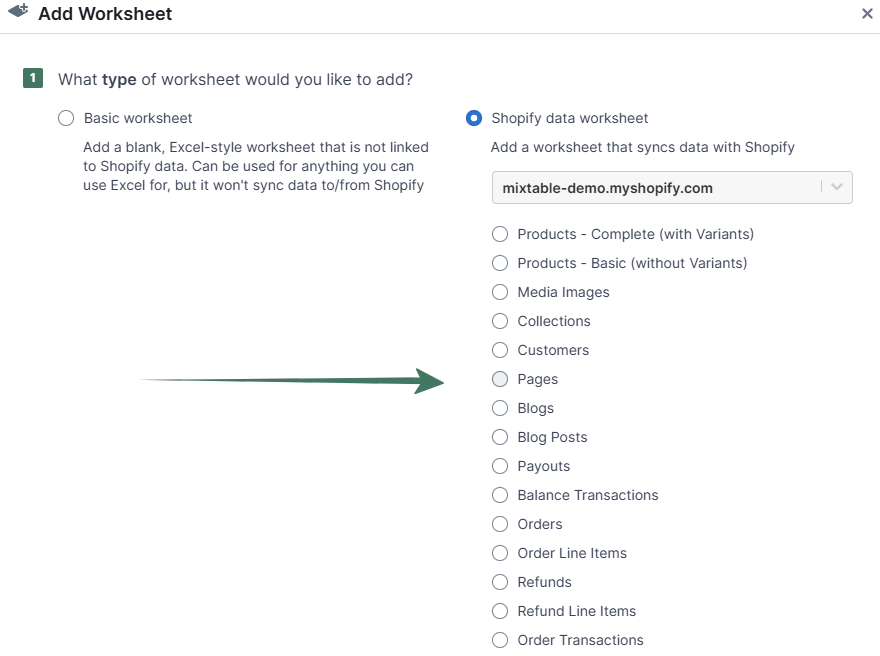
In an existing Mixtable spreadsheet, click the (+) button to add a new worksheet.
When prompted, choose to create a worksheet that syncs your Shopify store’s Pages. The worksheet will be created with a set of default columns mapped to data. You can add columns for any other Page data you want to include.
Mixtable will automatically populate these columns with existing data from your Shopify store.
Note: Shopify does not notify Mixtable when Pages are created or updated. To sync new or updated Pages from Shopify to Mixtable, click the “Sync Page data from Shopify” button in your Pages worksheet.
Step 3 (Optional): Configure a Conditional Worksheet
If you want to export only specific Pages or a range of Pages, you can set up a Conditional Worksheet. This feature allows you to specify the criteria for the Pages that should be included in the worksheet you plan on exporting.
Export Shopify Pages in .XLSX or .CSV
Step 1: Verify that you have the data you want
Before starting the export process, ensure all the data you want to export is correctly populated in the worksheet. This includes the Page title, content, tags, and any other metadata you wish to include.
Step 2: Export to an Excel file (XLSX)
To begin the export, click Import & Export in the top toolbar. From the dropdown menu, select Export to Excel. You will then be prompted to choose the location where you’d like to save the Excel file on your computer.
Step 3: Export to a CSV file
Alternatively, you can export the data to a CSV file. Select Export to CSV from the Import & Export menu to do this. Just like with the Excel export, you’ll be prompted to choose a save location for the CSV file.

Well done!
Mixtable Explore & Export is an Excel-like app built to sync data with Shopify automatically. It looks, feels, and behaves like Excel (including formulas), but runs in your browser. Find here:
- How to export Shopify products, products with metafields, and products with collections;
- How to export Shopify orders and orders with metafields;
- How to export blog posts or pages into CSV or Excel.
Because Mixtable keeps your spreadsheet updated automatically as your Shopify data changes, there’s no need to wait for manual syncs — just open and export.
Manage Shopify data in a spreadsheet.
Use Mixtable to edit, sync, analyze, import, and export your Shopify store data without CSV juggling.