Mixtable is an online spreadsheet, designed from the ground up to bulk edit and analyze Shopify data.
Got a question? We're here to help! Reach out at [email protected], and we'll get back
to you promptly.
Although Mixtable’s Excel-like spreadsheet interface is a very fast and convenient way to bulk update your Shopify store’s data we can make the process even faster. Mixtable has a number of Bulk Action features that help you with specific bulk edit actions that Shopify store owners frequently have to perform. These Bulk Actions features make bulk changes to the spreadsheet data, so you don’t have to make changes by hand to each cell, and you can then sync the changes to Shopify by clicking on the Sync worksheet changes to Shopify button, as usual.
The Bulk Action features available in Mixtable are: find and replace, bulk number updater, bulk tag addition, and bulk tag removal.
Looking to use the Bulk Action features on a subset of your data? For example, on select products only? Just use the Filter feature to do this. The Bulk Action features will only modify cells/rows that are currently visible in the spreadsheet. So if you have applied a filter to your data, only the data that is visible will be considered.
The Find and Replace feature allows you to find and replace specific text in bulk within a specific column. While you can find and replace text in any column in any worksheet, this feature is particularly useful when you are looking to bulk find and replace a word/phrase in your product descriptions, SEO title, SEO description, and option values. Find and Replace is also a super-fast way to rename a tag.
You activate Find and Replace by clicking on its button in the toolbar. In the dialog that opens you’ll see a few inputs:
There are cases where you need to make the same bulk change to a series of numbers. For example, you need to decrease price by 10% for Black Friday/Cyber Monday. Or you need to add $1.50 to the price of every product due to a corresponding increase in wholesale prices. This is where the Bulk Number updater feature comes in very handy. Note - the Bulk Number updater performs mathematical changes, and so will only update cells that have a number in them. If a column has a mix of numbers and text values, only the cells with number values will be updated.
You activate the Bulk Number updater by clicking on its button in the toolbar. In the dialog that opens you’ll see a few inputs:
Column Selector - this is how you choose which column in the currently active worksheet the Bulk Number updater will work on
Select operation - this is where you select what type of mathematical operation will be performed. The options are:
Value - The actual value you want to use in the mathematical update
Preview first 10 rows - if enabled this will preview the numerical operation on the first 10 visible rows in the active worksheet. This way you can preview what the output will be before you make it real
Bulk editing tags is fast and convenient by directly modifying cells that display a product, order, or customer’s tags. But if you need to simply add a tag, the fastest way is with the Bulk Add Tags feature. This feature is only available for worksheets that sync product, order, and customer information (as only this data in Shopify has tags). You’ll also need to have the Tags field mapped to a column.
You activate the Bulk Add Tags feature by clicking on its button in the toolbar. In the dialog that opens you’ll see a few inputs:
If you need to simply remove a tag, the fastest way is with the Bulk Remove Tags feature. This feature is only available for worksheets that sync product, order, and customer information (as only this data in Shopify has tags). You’ll also need to have the Tags field mapped to a column.
You activate the Bulk Remove Tags feature by clicking on its button in the toolbar. In the dialog that opens you’ll see a few inputs:
Add the Action Columns spreadsheet functionality to an existing product worksheet to edit Shopify tags in bulk.
Note: The worksheet needs to show product information. You can create one using our Basic Product Info template, or add a Products (no variants) worksheet to an existing workbook.
To load new Shopify data, start by selecting an empty column — any column with a non-green header (green headers mean the column is already linked to Shopify data). Then, click the ⚡️ button in the column header to open the selection window to choose the data you want to pull in.
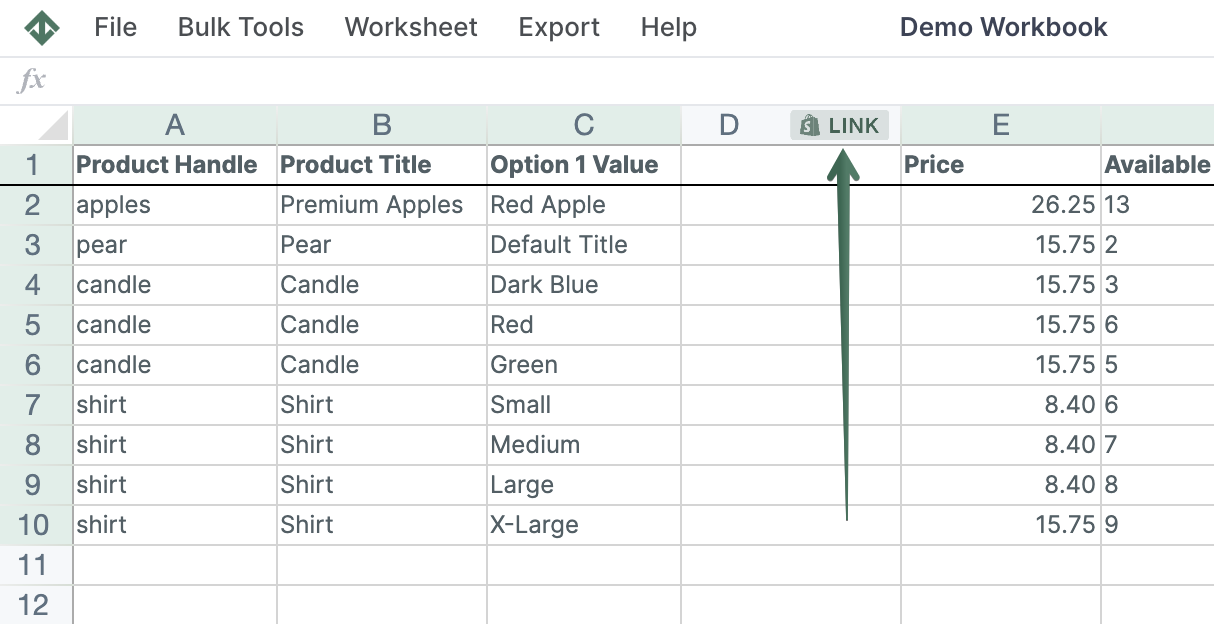
From the Shopify Sync Settings window, choose Action Columns.
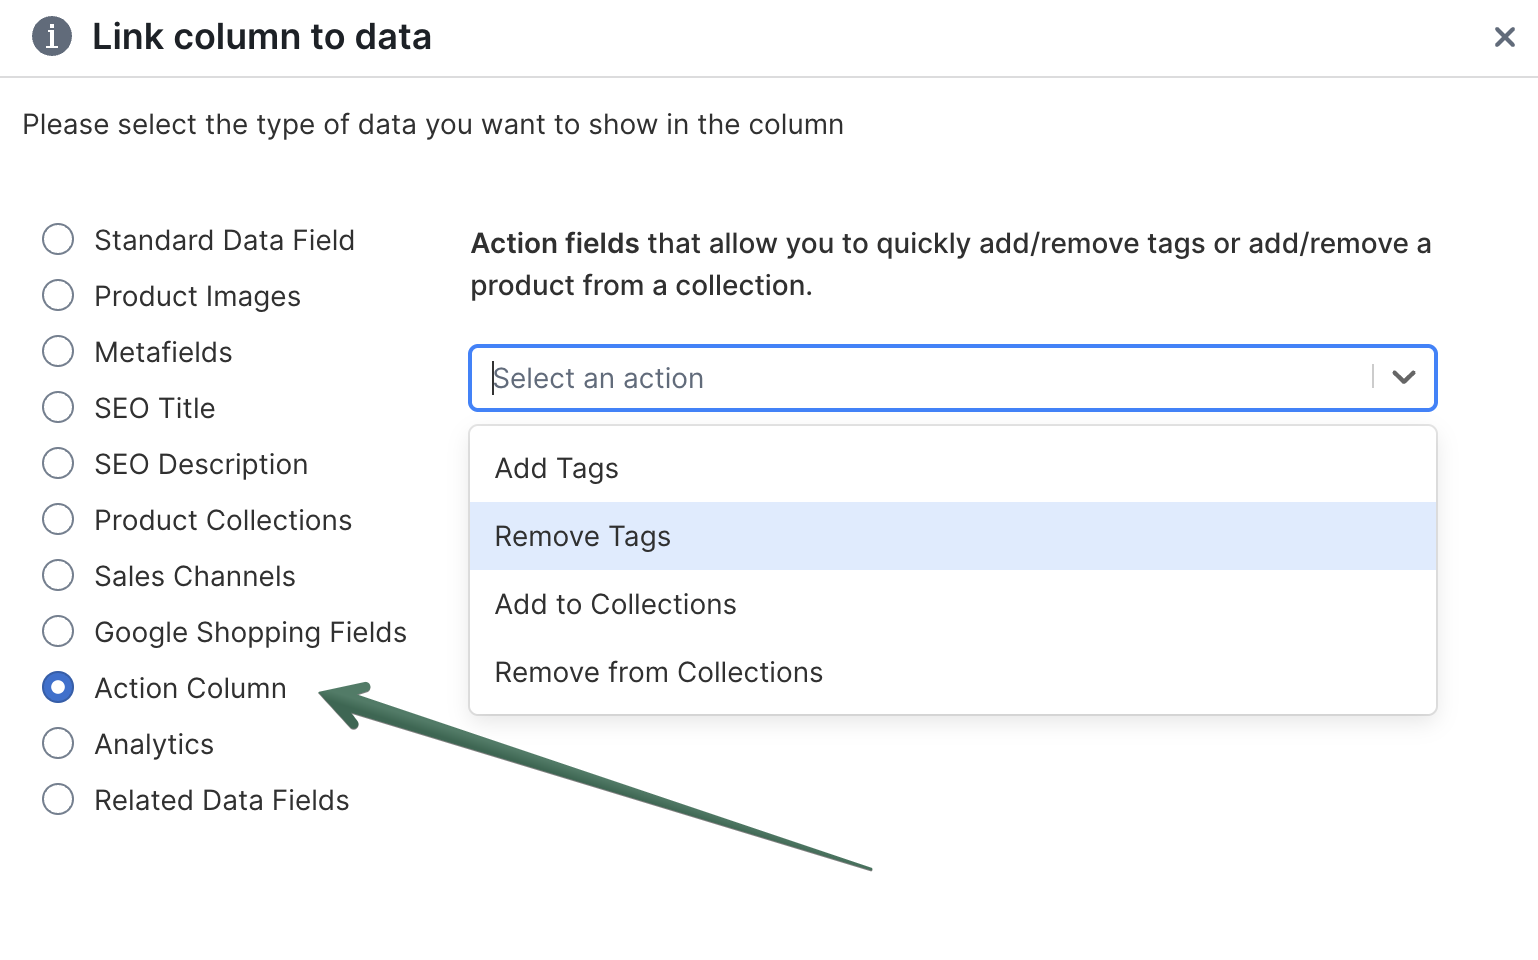
You can quickly add or remove tags once you link the Add Tags and/or Remove Tags columns to your products' spreadsheet. Here's how:
Note: If you have rules for automated collections based on tags, the new tags will add products to automated collections, and correspondingly, the removed tags will remove them from the automated collections.
Find more about Action Columns functionality here.
Add the Action Columns spreadsheet functionality to an existing product worksheet to edit Shopify collections in bulk.
Note: The worksheet needs to show product information. You can create one using our Basic Product Info template, or add a Products (no variants) worksheet to an existing workbook.
To load new Shopify data, start by selecting an empty column — any column with a non-green header (green headers mean the column is already linked to Shopify data). Then, click the ⚡️ button in the column header to open the selection window to choose the data you want to pull in.
You can quickly add or remove products once you link the Add to Collection and/or Remove from Collection columns to your products' spreadsheet. Here's how:
Find more about Action Columns functionality here.
You're ready!
Mixtable is an online spreadsheet designed to sync data with Shopify. It looks, feels, and behaves like Excel (including formulas), but runs in your browser. With Mixtable you can:
Best of all, you can sync changes back to Shopify with a single click. Find out more about the Mixtable suite of products here.