Bulk edit Shopify blog posts
Mixtable is a powerful spreadsheet tool designed to streamline the management of your Shopify store. While it’s commonly used for tasks like inventory management and order tracking, it can also be a valuable asset for managing your Shopify blog posts.
This guide will walk you through the steps to set up Mixtable for bulk editing your Shopify blog posts.
Setting up a blog posts worksheet in Mixtable
Step 1: Create a Blogs and Blog Posts workbook
- Open Mixtable and click on the “Add Workbook” button.
- If you’ve already installed the Mixtable app from the Shopify App Store, Mixtable will have initiated an initial download of your Shopify blog posts.
- From the list of pre-built workbook templates, choose Blogs and Blog Posts:

The Blogs and Blog posts workbook has two worksheets:
- One is called Blogs, where you see the Title, Handle, Shopify ID, Tags, and Comment Policy of the blogs you have on your Shopify store.
- The other is called Blog Posts and has the following columns: Title, Handle, Content, Author, Tags, Shopify ID, Blog ID.
Step 2: Add a new blog posts worksheet (optional)
- You can add a worksheet with blog posts to an existing workbook by clicking the
[+] button in the workbook toolbar to add a new worksheet.
- When prompted, select the option to create a worksheet that syncs with your Shopify store’s blog posts.
- The worksheet will have a set of default columns mapped to data such as blog post title, content, tags, etc. Feel free to add columns for any other blog post data you want to manage.
- Mixtable will automatically populate these columns with existing data from your Shopify store.
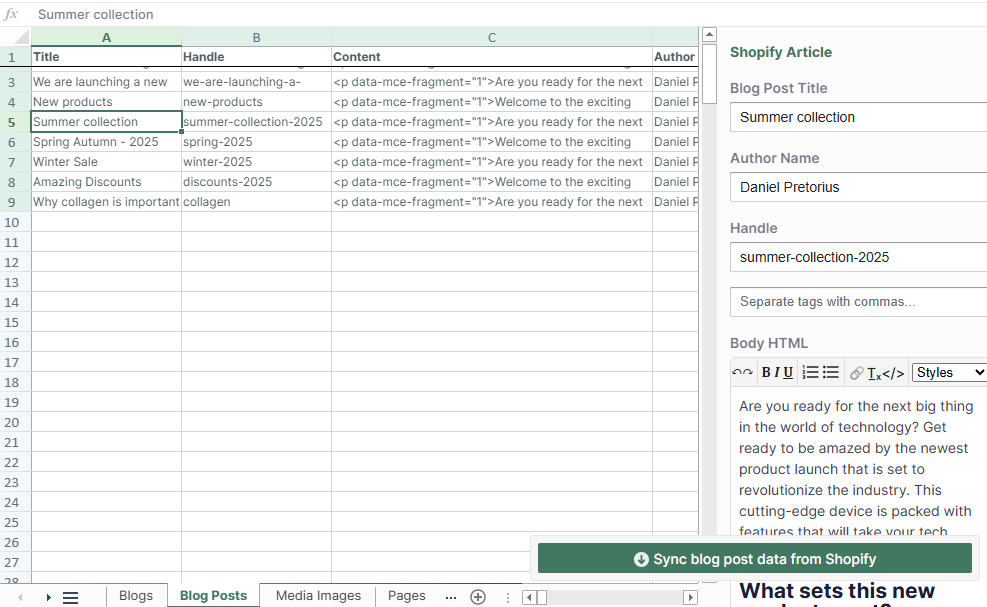
Note: Shopify does not notify Mixtable when blog posts are created or updated. To sync new or updated blog posts from Shopify to Mixtable, click the “Sync blog post data from Shopify” button in your blog posts worksheet.
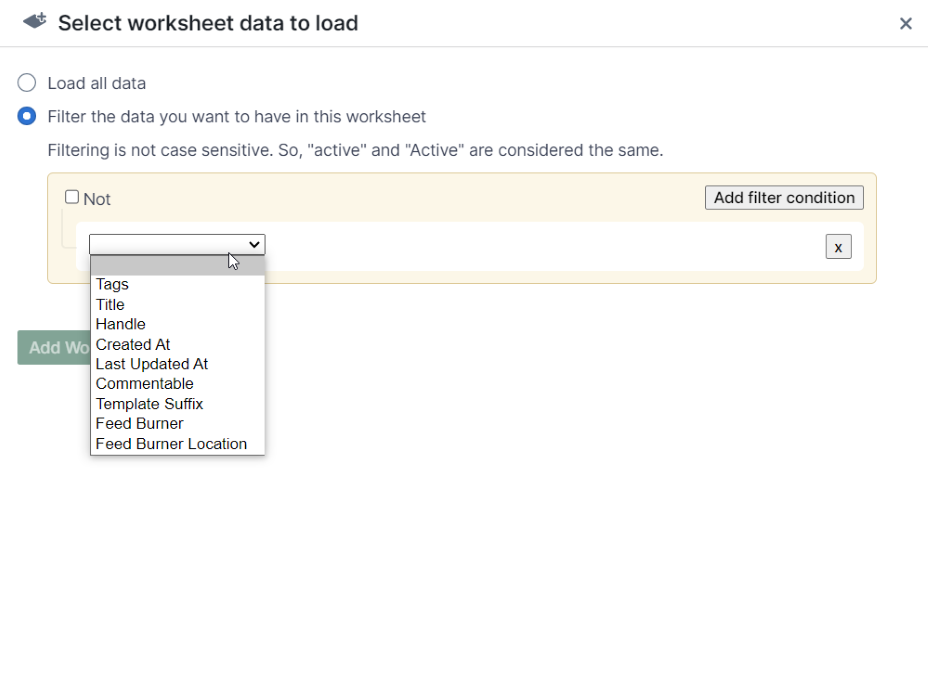
Optional Step 3: Set up a Conditional Worksheet
If you wish to edit only specific blog posts or a range of posts, you can set up a Conditional Worksheet. This feature allows you to specify the criteria for the blog posts that should be included in the worksheet.
Editing existing blog posts
- Navigate to the worksheet containing your Shopify blog posts.
- Locate the cells corresponding to the blog posts you wish to edit.
- Modify the existing cells to change the blog post title, content, tags, or any other metadata.
- If you wish to use the rich-text (WYSIWYG) editor to make changes to the blog post content, select the row of the blog post you want to edit and click to open the sidebar.
- Once you’ve made your changes, initiate a sync from Mixtable to Shopify to update the blog posts.
Adding new blog posts
- Navigate to the worksheet containing your Shopify blog posts.
- Scroll down to find a blank row.
- Fill in the blank row with the new blog post data, including title, content, tags, and any other metadata.
- Once you’ve added the new blog post data, initiate a sync from Mixtable to Shopify to create the new blog posts.
You're ready!
Mixtable is an online spreadsheet designed to sync data with Shopify. It looks, feels, and behaves like Excel (including formulas), but runs in your browser. With Mixtable you can:
Best of all, you can sync changes back to Shopify with a single click. Find out more about the Mixtable suite of products here.