Bulk edit Shopify metafields
Bulk edit Shopify metafields
Metafields are Shopify’s custom fields. You can use them to store and display information that doesn’t fit into the standard Shopify admin fields (for example: care instructions, sizing guides, badges, “complete the look” recommendations, or internal operations data).
Mixtable lets you view and edit metafields in a spreadsheet, then sync changes back to Shopify. It supports:
- Standard metafields
- List-type metafields
- Reference metafields (with an in-cell picker, so you don’t need to manually paste
gid://...values)
Before you start
- If you want to select metafields from a dropdown, create metafield definitions in Shopify (Shopify admin → Settings → Custom data). If you prefer, you can also enter the metafield details manually in Mixtable.
- Make sure you have a Mixtable worksheet syncing the Shopify object you want to edit (for example: Products, Variants, Collections).
Where you can use metafields
You can bulk edit metafields for these Shopify objects in Mixtable:
- Products: Specs, materials, care instructions, SEO content, badges, or custom sections.
- Variants: Variant-specific attributes like size notes, fit, swatches, or SKU-related details.
- Collections: Custom headers, banners, videos, or additional collection copy.
- Customers: Preferences, segmentation fields, loyalty attributes.
- Orders: Gift messages, fulfillment instructions, internal notes.
- Draft Orders: Similar to order metafields, but for orders that aren’t finalized.
- Blogs: Extra blog metadata used by your theme.
- Articles: Per-article fields (for example: recommended products, reading time).
- Pages: Custom data for static pages.
- Shop: Store-wide settings not tied to a single resource.
Mixtable shows these fields in an Excel/Google Sheets-style grid, so you can edit one row or hundreds at once.
Add a Shopify metafield column
To edit a metafield, map it to a column in the worksheet that syncs the same Shopify object (for example: product metafields in a Products worksheet). You’ll add a new column, set it to Metafield, then choose the metafield definition you want to sync.
-
Set up a spreadsheet in Mixtable and create a worksheet that syncs the object you want to edit (Products, Variants, Collections, etc.).
-
To load new Shopify data, start by selecting an empty column — any column with a non-green header (green headers mean the column is already linked to Shopify data). Then, click the
 button in the column header to open the selection window to choose the data you want to pull in.
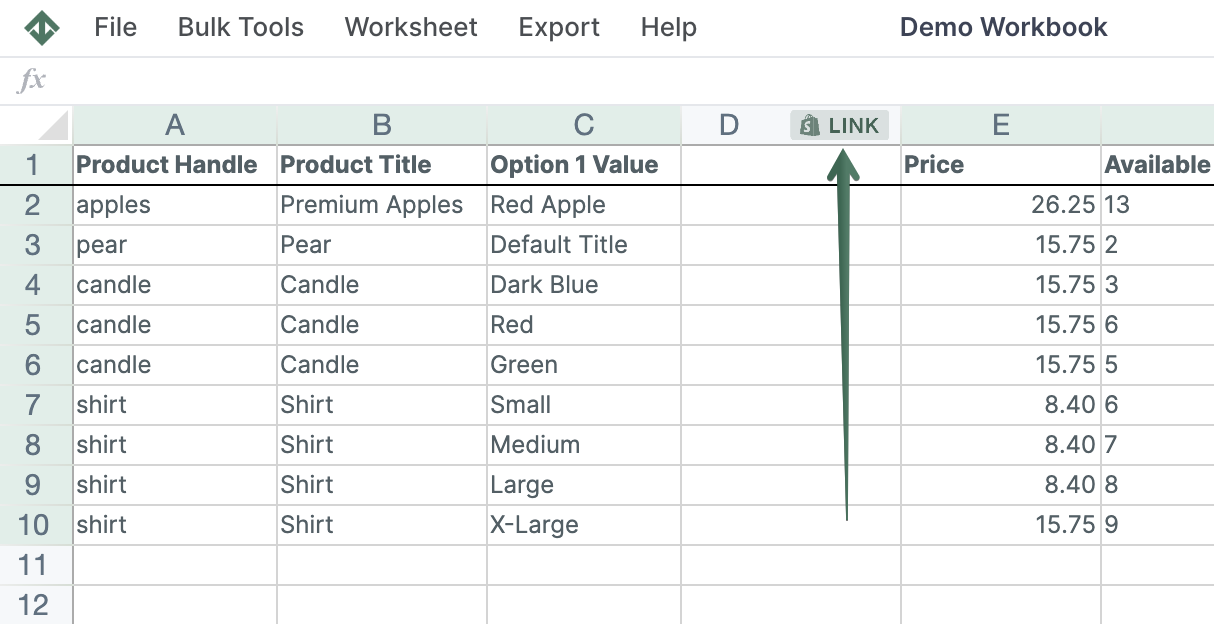
-
In the column settings window that opens, select Metafield.
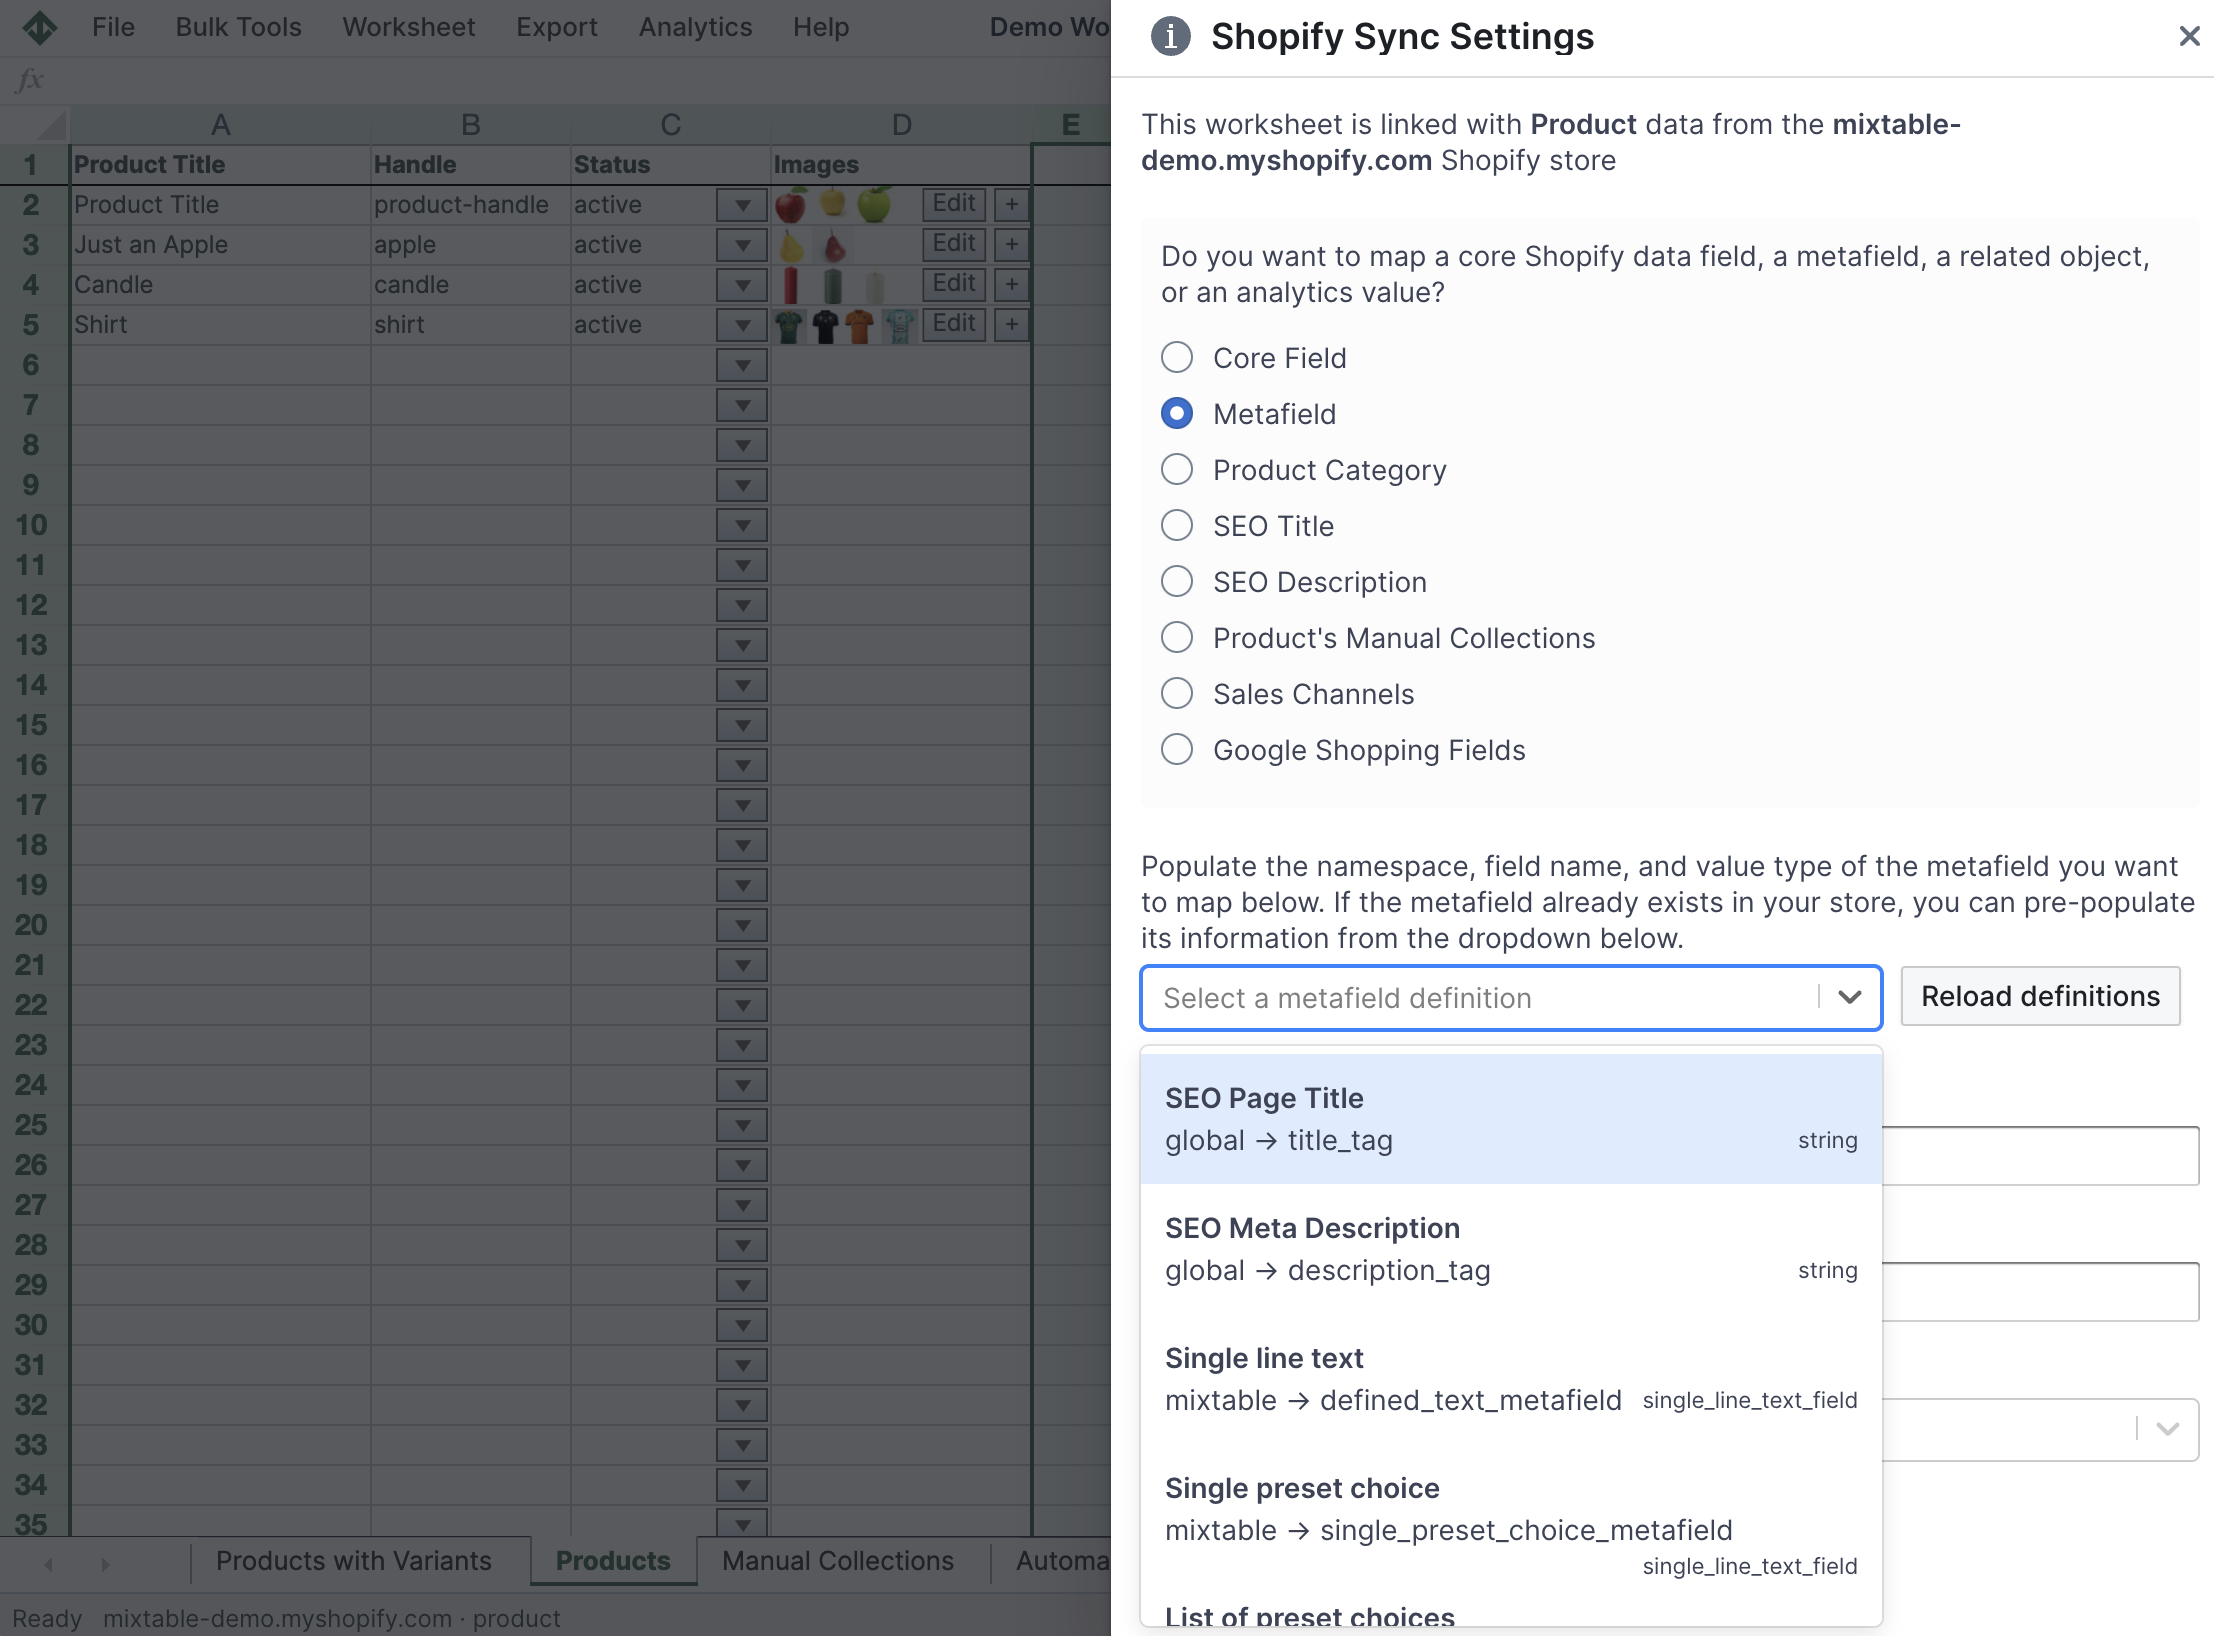
-
Pick the metafield you want to sync:
- Select it from the dropdown (this list comes from your Shopify metafield definitions), or
- Enter the metafield Namespace, Name, and Type manually.
Then click Save.
-
Mixtable adds the column and loads existing values from Shopify (if any).
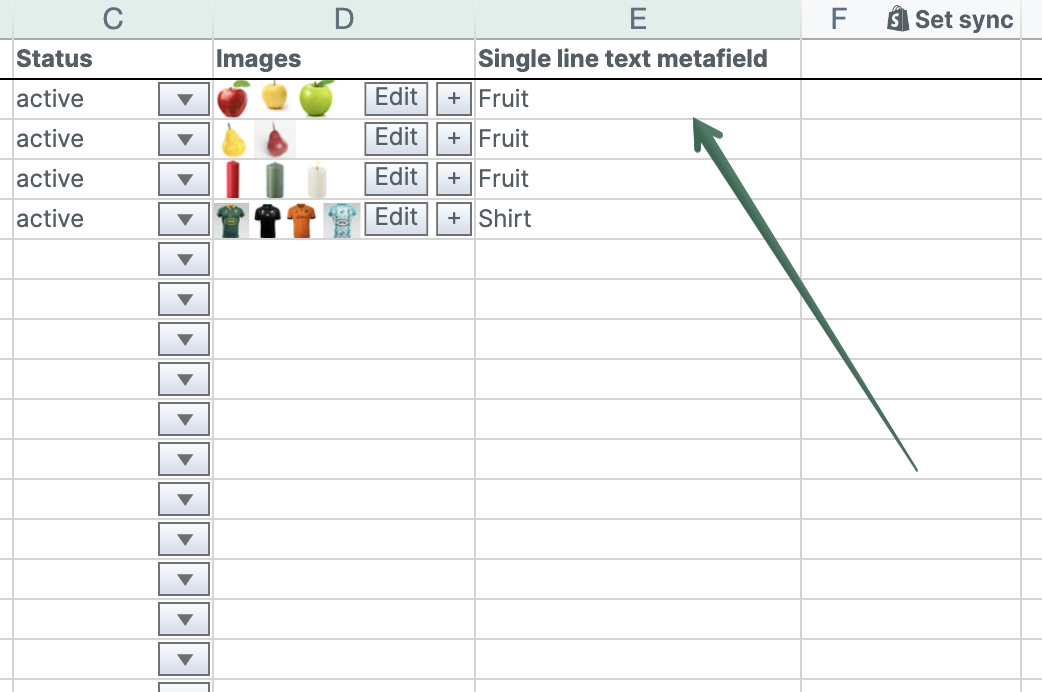
-
Edit cells as needed (you can fill down, paste values, or edit in bulk).

-
Click Send to Shopify to push updates back to Shopify. It can take a few seconds for changes to appear in the admin/storefront.
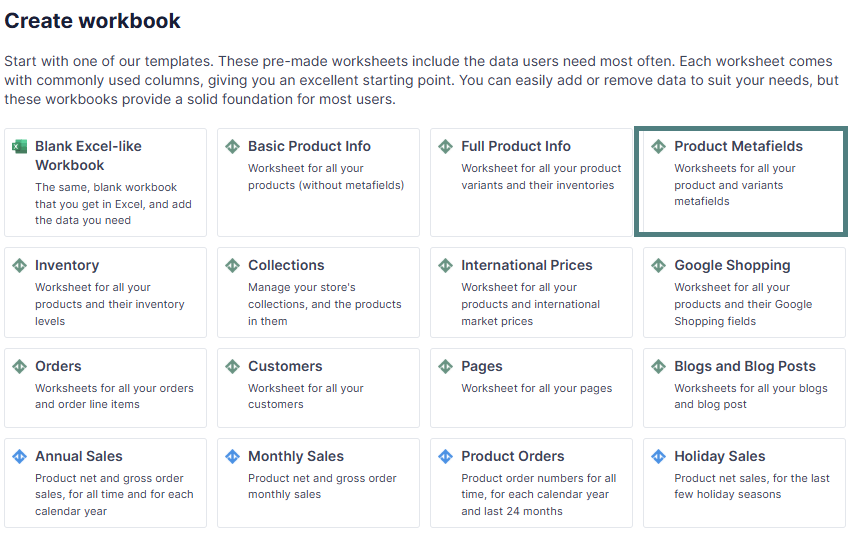
Use the Product Metafields pre-built template
If you want to bulk edit product and variant metafields, Mixtable’s Product Metafields spreadsheet template lets you get started in seconds. The template creates a ready-to-use spreadsheet with two worksheets, automatically populated with columns for all of your defined metafields—one sheet for product metafields and another for variant metafields.
Metafields with preset choices
Note: In Shopify, you can define a metafield to be limited to one or more values from a list of preset choices. These are single-line text metafields that either allow a single value or a list of values to be set, but these values have to be one of the defined preset choices.
When you map such a metafield to a column, Mixtable will auto-detect the possible preset choices and automatically add a dropdown to each cell in the column.
Use the dropdown to pick valid values (helpful for bulk edits and avoiding sync errors).
Reference metafields (product, variant, page)
Reference metafields store links to other Shopify resources (for example: linking a product to “related products” or a page to a “size guide” page).
When you map a reference metafield in Mixtable, it adds a 🔍 picker button inside each cell so you can search and select items instead of manually entering IDs.
Product reference metafields
- Map the Product reference metafield to a column as normal.
- Click 🔍 to open the product selector (filter by name, handle, or description).
- Select one product (or multiple, if your metafield is a list). Mixtable fills the cell with Shopify’s required value format (
gid://shopify/Product/PRODUCTID).
This is commonly used for “Complete the look” / “Shop the outfit” sections.
Variant reference metafields
- Map the Variant reference metafield to a column as normal.
- Click 🔍 to open the variant selector (you can sort by name).
- Select a variant. Mixtable fills the cell with Shopify’s required value format (
gid://shopify/ProductVariant/VARIANTID).
Page reference metafields
- Map the Page reference metafield to a column as normal.
- Click 🔍 to open the page selector (filter by name or handle).
- Select one page (or multiple, if your metafield is a list). Mixtable fills the cell with Shopify’s required value format (
gid://shopify/OnlineStorePage/PAGEID).
Troubleshooting
- Metafield not showing in the dropdown: Create it first in Shopify Settings → Custom data, then reopen the column settings in Mixtable.
- Sync errors after editing: Double-check the metafield Type matches the values you’re entering. For reference metafields, prefer the 🔍 picker to avoid invalid
gid://...values. - No dropdown for preset choices: Confirm the metafield definition is a single-line text metafield with preset choices in Shopify.
You're ready!
Mixtable is an online spreadsheet designed to sync data with Shopify. It looks, feels, and behaves like Excel (including formulas), but runs in your browser. With Mixtable you can:
- Bulk add products to collections, edit metafields, add or remove tags;
- Change product prices, including international prices, and review price history;
- Manage customers with a spreadsheet CRM for Shopify;
- Use Excel features like sort ascending or descending, find-replace, filter, and more.
Best of all, you can sync changes back to Shopify with a single click. Find out more about the Mixtable suite of products here.
Manage Shopify data in a spreadsheet.
Use Mixtable to edit, sync, analyze, import, and export your Shopify store data without CSV juggling.